Paraview Quick Tutorial
Parallel Execution
mympirun -np 4 -machinefile some_nodes ${PARAVIEW_HOME}/paraview --use-offscreen-rendering
Notice that the --use-offscreen-rendering works for v.1.8.5, but not 1.9.0
It also requires the right environment setup. under asap that meant modifying
mpirun (just an ascii
/bin/sh script) so that the RSHCOMMAND does "ssh -Y -A" instead of "ssh -x".
Running Paraview
 ~
~
|
- start paraview
- for simple serial
paraview&
- for mpi parallel on ASAP (see explanatio above):
   mympirun -np 3 \
      -machinefile some_nodes \
      ${PARAVIEW_HOME}/paraview \
      --use-offscreen-rendering &
|
 ~
~
|
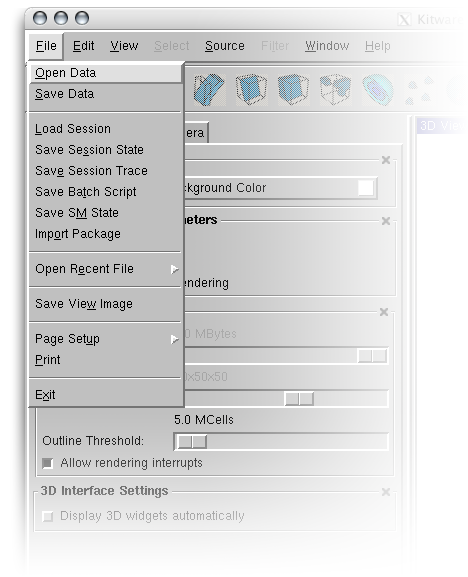
- Select
Open Data from the File menu
|
Setting up for Animations
 ~
~
|
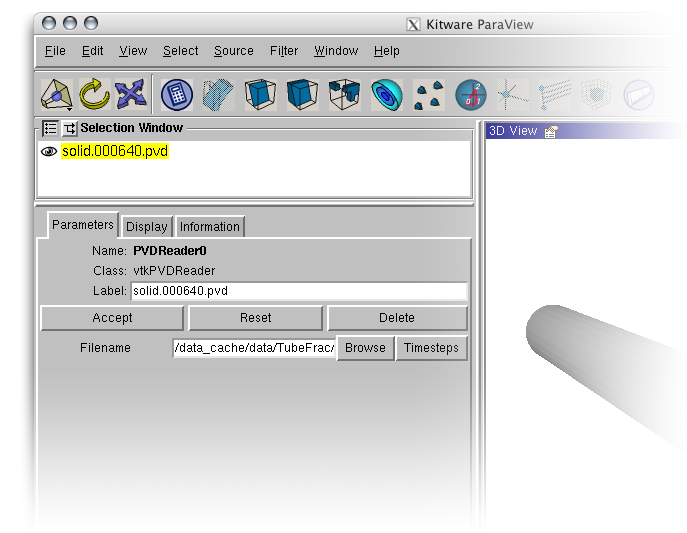
- Open the data file you wish to open
- If doing an animation open the lowest data frame
* It is optimal if the only files in the directory are the needed data files
- Click on
Accept
|
 ~
~
|
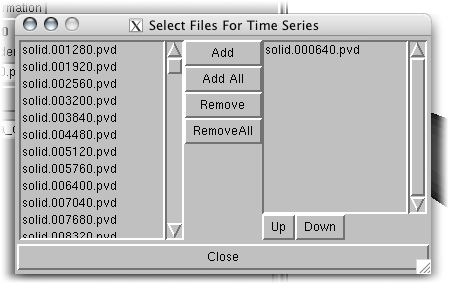
- If there are multiple timesteps, simply click on the
Timesteps button
- if you are in the correct directory, simple click on
Add All to add all the needed timesteps. If named correctly, they will be added in the correct order.
- If you are dealing with multiple parts, such as a fluid and a solid, simple repeat from Opening the data for each piece.
|
 ~
~
|
- After all the files have been added the file slider will show the number of frames available.
- Select the frame you want to currently see and click
Accept again.
|
|
~
|
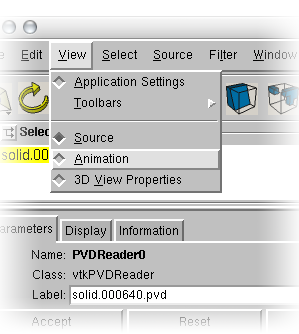
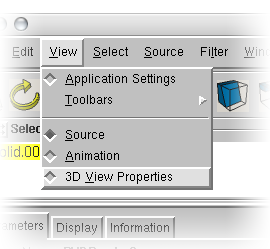
- To play an animation, or record frames as images for a movie select
Animation for the Views menu.
|
 ~
~
|
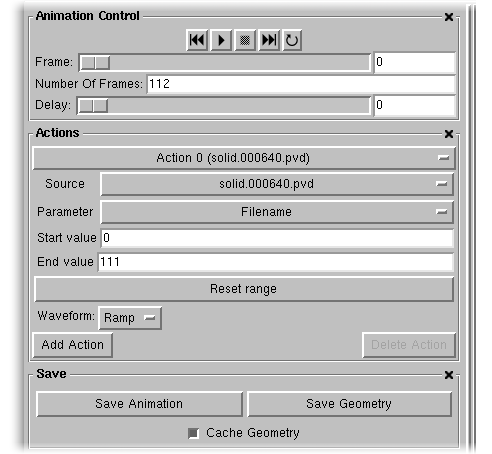
- Customize the animation settings to reflect what you want to animate
- To animate frames, simply select the base frame name (frame reader) as the
Source
- Under
Parameter choose Filename. The start and end will automatically renumber to 0 to the number of frames.
- If you want more than one thing to animate, such as a fluid and a solid, then simply have an accion (use
Add Action), for each of the parts you want to change with time.
|
 ~
~
|
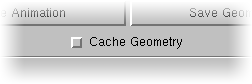
- Notice: that in order to make sure you do not run out of memory, uncheck the
Cache Geometry option.
|
 ~
~
|
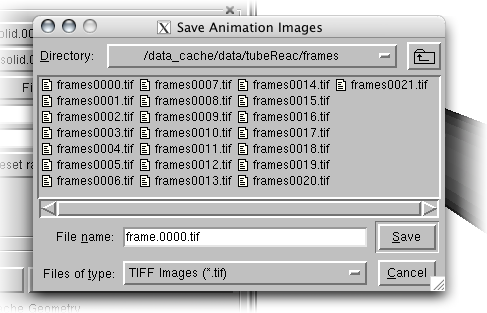
- Then, if you want to make a movie out of it, set the number of frames for the movie to be the same as the number of data files, and click on
Save Images
- Paraview will prompt you for a filename and directory.
TIFF=s work best. Give it a name, and paraview will insert the frame number before the =.tif extension.
|
Setting Parameters in Parallel Execution
 ~
~
|
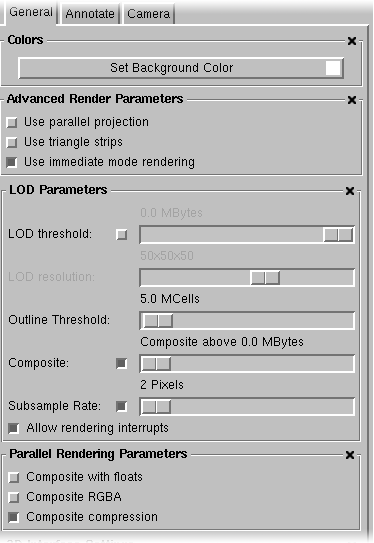
- The threshold for when data is rendered on the front client versus each of the render servers can be setup from the
3D View Menu on the View menu.
|
 ~
~
|
- The key to having your paralle exection respond the way you want it is by doing the correct parallel setup. The differnt options are explained when your mouse goes over any of the available checkboxes. The default values should work fairly well if you are not familiar with each of the options.
|
You just mastered Paraview !!!!!!!!!!
Enjoy!
Compilation
ASAP has the latest compilation of Paraview, as well as many different versions, some using local GL and OSMesa, some just using MESA. However if for some odd reason you insist you want to compile your own Paraview, then visit
http://www.cacr.caltech.edu/~slombey/asci/paraview/. If you follow the different flags, and point to the right things when
ccmake, then it should no te too hard.
--
SantiagoLombeyda - 26 Apr 2005
 ~
~
 ~
~
 ~
~
 ~
~
 ~
~
 ~
~
 ~
~
 ~
~
 ~
~